I completed two tasks on my Bede BD-4C airplane this week: the oil door and the induction air tubing.
Oil Door
I fabricated an oil door in the cowling of my Bede BD-4C. Unlike cars, airplanes do not have hoods which can be popped open. The cowling is typically secured on with Camlock or DZUS fasteners. You can remove the top of a light airplane cowl in a few minutes but we need something simpler that will allow checking the engine oil before each flight: a small oil door.
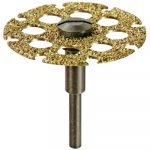
The cowl of my Bede BD-4C is carbon fiber. Cutting the hole was easy with a Dremel and the 543 plastic cutting wheel. I used the Dremel to rough cut the shape and then my flat file to finish the hole off to the exact size that I wanted, five inches square.
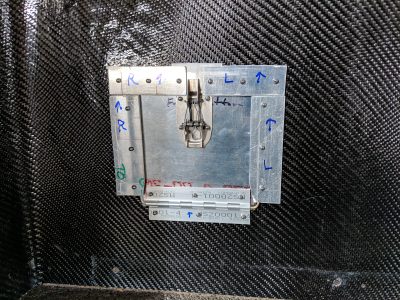
I used a piece of piano hinge and a spring loaded oil door latch. The latch requires a lot of force to operate it so I made the inside of the door out of 0.063 aluminum for rigidity. This is what it looked like with the pieces cut and ready for paint.
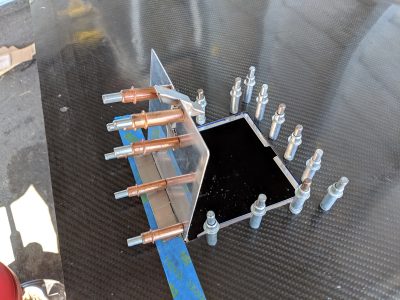
I learned that carbon fiber will corrode aluminum so you either need to paint the aluminum or put a non-corrosive barrier between them before riveting the two together. (Thanks for the tip, Tim.)
Here is the finished door, after riveting.
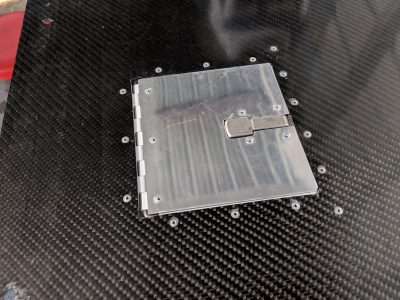
I was surprised how wide a gap I needed over the hinge. Next time I make an oil door, I will use one of the special hinges that completely eliminated that gap. However, despite the gap, the door serves its purpose.
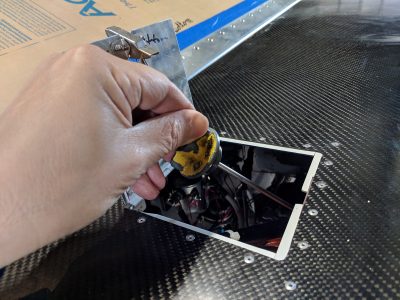
This shot of the underside of the door shows all of the pieces. The latch and latch plate are stainless steel. The rest is aluminum.
Induction Air Tubing
There is a hole in the front of the cowling for the induction air (the air that gets sucked into the engine for burning the fuel). I filed down the shoulder on a tubing flange and epoxied it to the cowling.
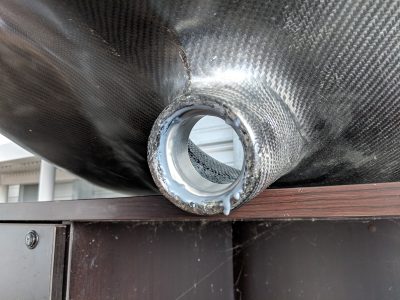
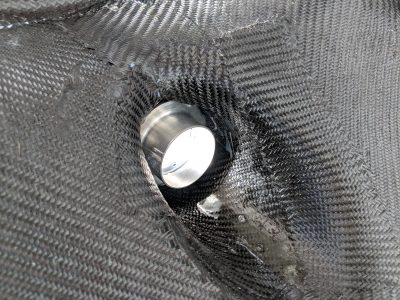
Here is a photo of the air filter box that I fabricated for the front of the air induction inlet on my engine. I attached a short piece of SCAT tubing to it and used hose clamps that can be tightened without a tool.
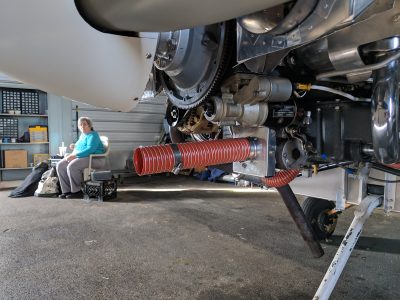
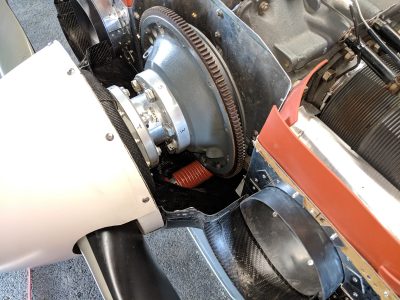
With the bottom of the cowling installed on the airplane, I can snake my hand down in front of the flywheel, attach the SCAT tubing to the flange, and tighten the hose clamp.
Exciting Scheduling
With those two tasks out of the way, I was excited to realize that I am finally down to the last ten tasks which need to be completed before the airplane’s airworthiness inspection. None of these will take long so I plan to have them all complete by December 8.
- Seal the holes (for wire and control cable pass-throughs) in the firewall.
- Install the seat and shoulder belts.
- Install the N-number (N2468Z) stickers on the outside of the fuselage.
- Seal the gaps around the bases of the dorsal and ventral fins.
- Install a documentation pocket to hold required paperwork in the plane (registration and airworthiness certificate) and a couple of placards (“experimental” notices, fuel type, fuel quantity, etc.).
- Install the windshield and side windows.
- Bond the last two pieces of fuselage skin onto the frame.
- Install the static air ports into the holes in the fuselage skins.
- Install the magnetic compass.
- Weigh the airplane and produce the weight & balance document.
I am working with my A&P at St. Charles Flying Service to assure that all of the paperwork for the engine is in order and am scheduling the inspection with my DAR (FAA Designated Airworthiness Representative).
There are several more things to be done before I actually fly the airplane, and I can continue work on them prior to completing the inspection, but this is a cool point in my project to have reached.

✔✔✔✔
Looking good Art. What are you using for the bonding material for the skins?
3M Neoprene Contact Adhesive 10 (f/k/a Scotch Weld #10)
Art, I’m so glad that you’re looking at some light coming from the end of the tunnel…
Thanks again for allowing me to make some small contributions to your efforts along the way!
I can’t wait to see the crazy smile on your face after that initial flight ?
Back in the 1980s, when I took lessons, using either a C172 or a PA28, we could open the cowlings, and my instructor taught me to look around at everything that could be or come loose, including safety wire, etc.
How often do you plan to inspect the engine?
Also, what sort of engine is in there?
Best,
Ed
Hi Ed,
I will be changing the oil every
10050 hours. As part of that task, I will remove the cowl and do a visual inspection of the engine and accessories. I will also have a lab run an oil analysis.The engine is a Lycoming IO-360-A1A, 200 HP fuel injected, four cylinder.
— Art Z.
Don’t you mean 50 hour oil changes? That is what’s recommended on my Lycoming IO-360 with an oil filter (not just a screen, where oil changes are even more frequent).
Anyway thanks for sharing your progress on this.
Good catch. Thanks, Roy. I should have written 50 hours.
Got it. I wish you many oil changes.
Wouldn’t a huge rubber band be simpler?
Looking really good Art!