Try saying “roof ribs” three times fast. I’ll wait.
Very good! You did better than most people. I am impressed and you have earned the privilege of reading the rest of this blog post on building the roof ribs for my Bede BD-4C airplane. 🙂
The roof of the Bede BD-4C is a large rectangle of thin aluminum, roughly 4 feet x 5 feet. It is riveted to the airplane at the four edges. It is so thin that it needs four ribs to support it in the middle. How thin is it? Just 0.020 inches thick, which is just about the thickness of five crisp new dollar bills or the letter “I” on your keyboard.
The top of the plane is curved, following the shape of the top of the wing, which makes installing the roof a bit tricky. Not only is it an aerodynamic part of the airplane but, to look nice, it should be smooth and neatly aligned with the wings. I puzzled over several challenges in making these parts and owe kudos to the good folks at BedeCorp for providing me with some invaluable feedback.
Ideally, I would install the roof and then fasten the ribs to the bottom of the roof. That is the wrong order, though, because the ribs have to be in place to get the roof properly aligned and the roof will sag in the middle without the ribs. Additionally, if the roof were in place, I would not have access to the ribs to fabricate the brackets to hold them in position.
What I needed was something to act as a surrogate roof. Something
- absolutely rigid,
- which was light enough to move around, and
- inexpensive enough that I wouldn’t mind throwing it away after the job was done.
Fortunately, I found a custom BD-4C roof rib installation jig in the Aviation aisle at Home Depot, cleverly disguised as a 12 foot long drop ceiling suspension main tee. At $6.25, it fit my needs… to a tee.
Each roof rib started life as a squared off letter U, roughly 0.75 inches on each of the three sides, and 42 inches long, the width of the BD-4C cabin. I had previously fabricated 24 L-shaped brackets to hold the ribs in place, as you can see in my little video How to Make an Aluminum Airplane Part.
I took advantage of the fine weather yesterday to get the airplane out into the driveway and install the wings. I taped shims of 0.020 aluminum to the top of a rib, like this:

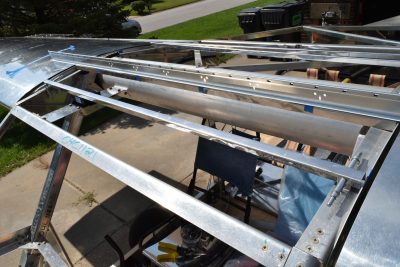
I clamped the rib, with the shims, to the bottom of the drop ceiling tee. Then I laid the tee across the tops of the wings. The rib was then suspended 0.020 inches below the bottom of the tee, in exactly the position it would need to be in if the actual roof were in place. This is what rib #1 looked like, clamped to the tee and suspended between the wings:

With the rib in place, all I needed to do was drill holes for the L-shaped brackets and cleco everything together. It was hot work in the St. Louis sun, but not particularly challenging.
Here is a photo of rib #2, underneath the drop ceiling tee, ready to be clamped in place. You can see the completed rib #1 in the foreground.

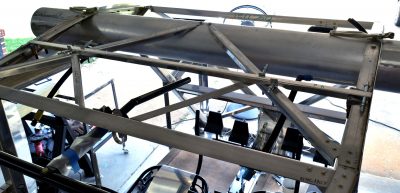
The front two ribs were the easiest because there are only four brackets holding each in place. The back two ribs took longer. Each had eight brackets and each needed to be trimmed to fit into narrow spaces between the fuselage structure and the roof. You can see what I mean in this photo of rib #4, partially installed.

Finally, and most important, my undying thanks to all the good people who helped me wrestle the wings onto and off of the airplane: Candy, Kevin, Geoff, and David. I could not have done this job without you!

I don’t remember the details of the BD-4 roof. Seems like there was an “X” bracing. It was notched to clear the center spar I think. Yours looks very nice. Keep up the great work!
Art, I lost 1.5 lbs in sweat and was able to skip my workout thanks to those $?&@”! wings!! Anytime, bro… ?