The Bede BD-4C is a nutty efficient airplane but, since it was designed in the 1960s, some aspects are a little dated. In particular, the plans call for the cabin to be fitted with just three seat belts: one for each front seat occupant and a single belt to be shared by the rear seat passengers. The original design had no provision whatsoever for shoulder belts though the current Bede BD-4C plans do show shoulder belt anchors, albeit less substantial than I wanted.
I updated the interior appointments, including four-point safety harnesses for each person in the plane. This blog post describes the seat belt anchors and shoulder belt anchors for both the front and back seats of my BD-4C airplane.
I started by drawing the anchors for the shoulder belts. Here is what I came up with for the front seats. I know that it’s not readable below because the lines are too thin; click on it to see a larger version.

When I showed that diagram to people and asked for feedback, universally, everyone suggested that I not use such sharp points. 🙂 I had to explain over and over again that I was simply lazy while doing the drawing and that the points would be nicely rounded off!
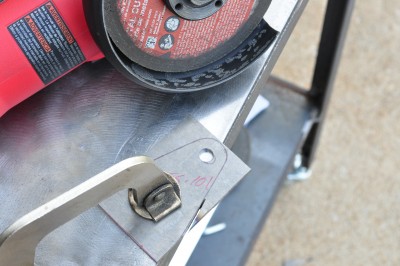
I drew the parts on steel and cut them out, just like arts and crafts from grade school but with steel and power tools instead of paper and blunt scissors.
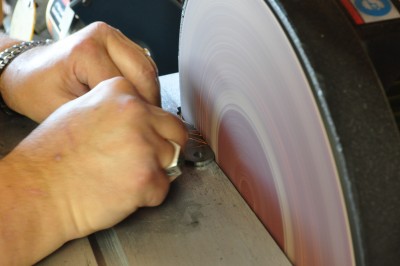
Dave helped out on the sander. He is now a certified pro at rounding off the ends and cleaning up the edges. Through trial and error, he discovered that the optimal distance between his fingers and the sanding disc and he can tell you with great authority that it is more than zero inches.
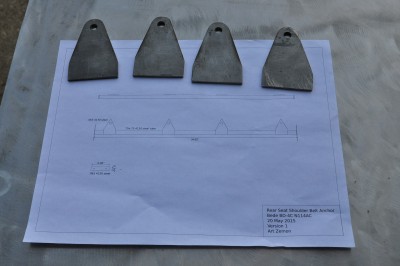
When all the sanding was done, we had a dozen anchors. Here are four of them, sitting on the diagram for the rear seat shoulder belt diagram.
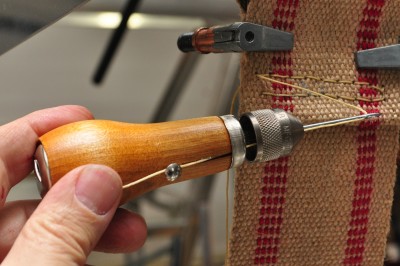
It was one thing to draw a shoulder belt anchor with four tabs nicely spaced apart. It was another to consider welding them permanently into position and then (possibly) discovering that the belts rubbed uncomfortably on a passenger’s neck. The solution was to sew up some webbing so that I could actually sit in the back seat. I used upholstery webbing and a sewing awl. All in all, it wasn’t too bad a job. (Sorry, I couldn’t resist.)
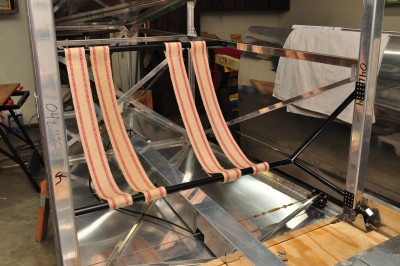
Once I had a single strap done, I sat in the back seat and used myself as a model for positioning the shoulder and seat belts.
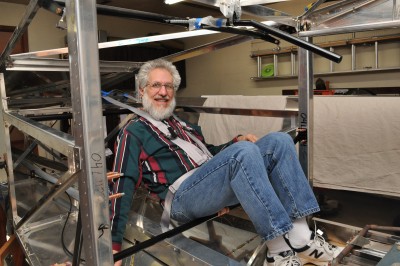
At the end of this exercise, I had three of the four belts clamped into position (both shoulder belts and the outside end of the seat belt). From this, I was able to mark all of the steel for welding.
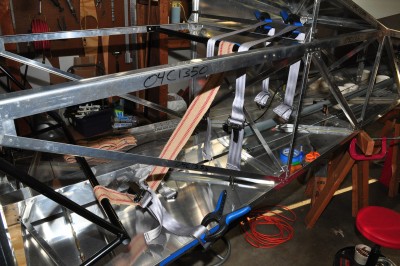
I repeated the process for the front seat shoulder belt anchor and here are the results.
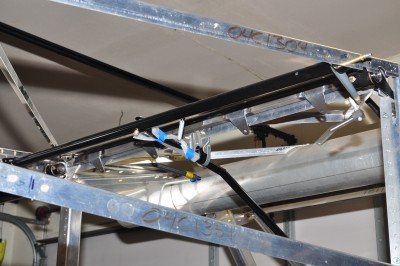
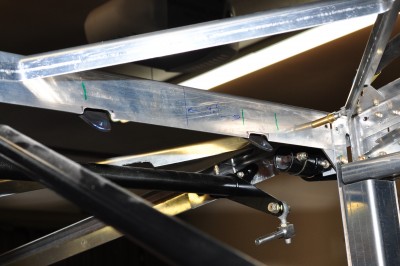
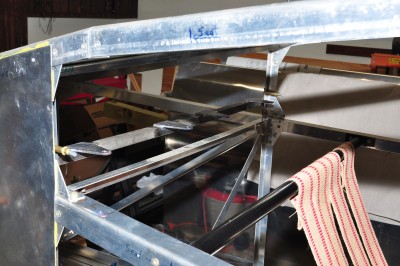
With the shoulder belt anchors complete, I attacked the seat belt anchor for the back seat. This was the trickiest anchor because it runs across the bottom of the plane and “crosses” an diagonal angle brace. Nothing on this anchor is square since the fuselage tapers and the angle brace is off-center. It also has to run through the tunnel, beneath the rudder cables and the push-pull rod for the horizontal stabilator. The anchor isn’t perfect but I am pretty pleased with how it came out. Even more important, I am quite confident that it is strong.
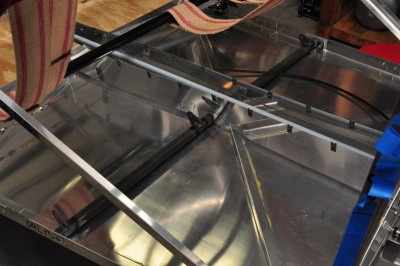
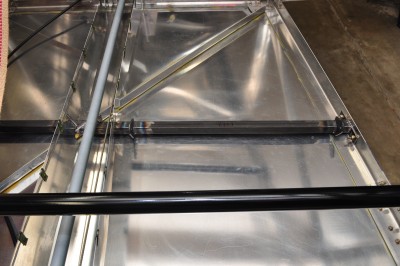
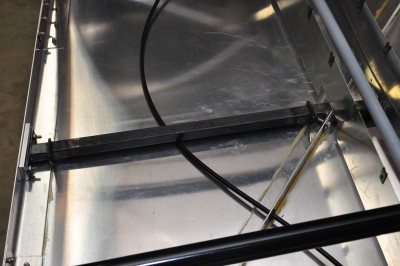
Here is a close-up of the tricky part, the middle where the two halves of the anchor meet underneath the rudder cables and push-pull rod. The two halves of the anchor sandwich the diagonal fuselage brace.
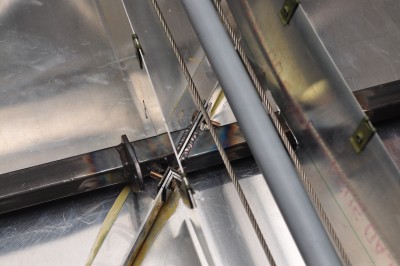
As I said, the rear seat belt anchor did not come out perfectly. If you look closely at the outside end of the right half, you will seen that I needed a 0.25 inch spacer. I decided it was easier to “make the fuselage narrower” than to stretch the steel anchor.
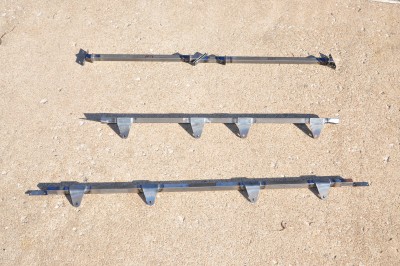
Here is one last photo: all the steel outside the plane just before I cleaned the anchors up for painting.

Art:
Thank you for the “compliment ” regarding my steel shaping skills ?. I’m proud to know that I’ve contributed so meaningfully to your little project so far, though with any luck from here on in, my future efforts will be accompanied by sweat alone; enough with the blood and tears. ?
Lucky for you this is a volunteer effort on my part – no Worker’s Comp!! ?
LOL, Dave. Thanks again for all of the help. 🙂
Ready when you are, Cap’n!
Hi, Art,
Let me relay an old machinist’s trick: When doing close in work on a grinder or sander one can tape the exposed fingers with adhesive tape. Back when I was a younger kid there was a company that marketed same with a higher abrasion resistance but I haven’t seen the product in a great many years. The advantage is that one can feel the abrasive contacting the tape, allowing for adequate reaction time, before the abrasive contacts skin. The trick is to use just enough so that there is some tactile sense remaining. Ciao.
Good idea!
Pete:
Thanks for the tip… I’ll definitely try it the next time Art decides to put my career on the line ( I’m a keyboard musician! ?). Wish I’d read this three months ago…
Cheers,
Dave
Thanks for the update, Art. What you are doing here is the part of projects I like the most. When the plans let you down, or adjustments or modifications need to be made. You have to get creative and solve the problem! Sometimes the insight hits you as you are drifting off to sleep, or in the shower. Slows you down, but is satisfying when you are done. Keep having fun!
Yes indeed, Don. I have had a ball doing the engineering work on the seats and safety belt anchors.
— Art Z.
ART, careful with the 4130! Too much of that and you won’t get off the ground! Just kidding. Gale
Art, yesterday I visited a friend who two weeks ago helped demonstrate that an 18-wheeler can T-bone an SUV without sustaining more than cosmetic damage. Fractured hip, gashed foot, and broken ribs aside, my friend is doing okay, and he would probably be doing much worse if his car hadn’t had (speaking of his car in the past tense is now the sole option) side-impact air bags. Which leads me to inquire whether air bags are ever used in private aircraft like yours. I know you want seat belts not so much because of accidents, which you’ll never have anyway, but so you can do barrel rolls and fly through tornadoes. (Simultaneously?) From my amateur’s perspective, air bags seem logical — though I grant there are licensing hurdles associated with selling explosives. Anyway, your thoughts?
I have given this some serious thought. There are, indeed, airbags available for light aircraft. Here is an FAA brochure, Airbags Save Lives! All of the ones that I have seen are built into three-point harnesses like you see in cars. I am opting for four-point harnesses without inertia reel retractors. Since they do a better job of restraining the occupants, I don’t think that I will also need airbags.
With the price of aircraft air bags you could go with an aircraft BRS! With that no worries of the crash landing either. Art looking good so far!. I have enjoyed seeing that we end up at the same point with issues but using different solutions. Makes me go Ah Ha I knew I couldn’t be alone! I too have had to design seat belt Mods and seat rail supports.
As usual, great work! I did just a three point. Looks like good engineering and execution. I did the sheet metal rear seat. The sling type sort of wiggles in the air. Your’s will be lighter.
Keep up the great work.
Nice work, Art. I just did the install of 3 pt belts in front and lap belts in back in my BD-4; the work only took a couple of hours but the head scratching beforehand took a couple of years!
Jay: Did you put one or two lap belts in the back? — Art Z.