I started on the flaps for my Bede BD-4C airplane this week. The adventure began on Monday when Jim and Patrick and Rich very kindly came over and helped carry the wings out of the basement and into the garage. Each wing is 10 feet long and weighs about 85 pounds. The weight isn’t so bad; it’s the large awkward shape that makes these things such beasts to schlep around.
Let me take you on a photo tour. (Click on any photo to see a larger version.)
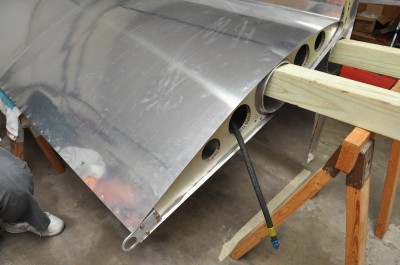
Here is a shot of the inboard end of the left wing, meaning this part of the wing will go up against the fuselage. The hose hanging out is the fuel line; there is a 25 gallon fuel tank in each wing. The wooden 4×4 is stuck into the main spar, a 6 inch diameter aluminum tube that runs the whole length of the wing. This spar is, literally, the thing that holds the entire weight of the plane while in flight. The Bede BD-4C is incredibly strong and is rated at 9 G’s. Since the plane has a maximum gross weight of 2400 pounds, the spar can carry 9 x 2400 = 21,600 pounds. You can see why I don’t worry about my plane breaking up in flight!
There will be a 10 foot long aluminum tube running the entire length of the trailing edge of the wing. It will control the ailerons (more on that in another posting) and the flaps will turn around it. Here is a close-up of the inboard bracket for the torque tube.
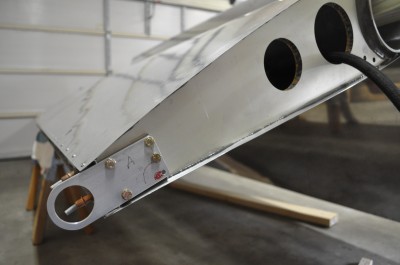
It looks like the bolts run into the rib but they actually run through the rib and into nutplates. Since the rib is just honeycomb material, it is not strong enough to support nuts and bolts directly. It is also thick enough that it would be pretty hard to rivet nutplates directly to it. So I made a brace to hold the nutplates and that sits inside the wing.
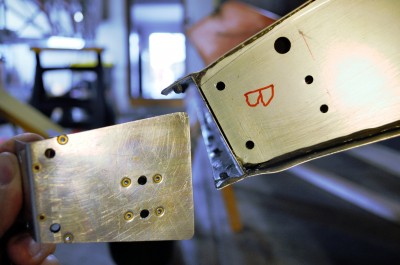
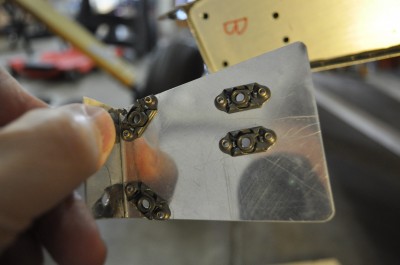
Installing the bracket was easy… for the skinny teenage kid next door (thanks Luke!!!). All he had to do was snake his arm through the lightening hole in the rib just below the spar and hold the brace in place. After watching him do it on the left wing, I found that I could just barely get my arm into the right wing and was able to do that one myself.
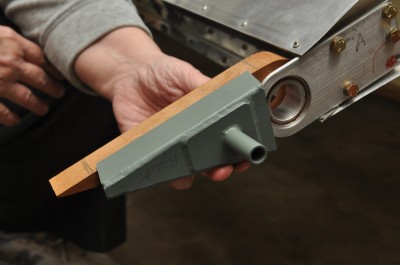
With the bracket bolted to the wing, the next step was to prepare the innermost rib for the flap. There is a steel weldment that goes over the rib and actually moves the flap and up and down. I had to drill a hole in the rib for the tube in the weldment and also had to file the rib a bit to fit inside the weldment. There are a pair of bearings which carry the load of the flap and allow it to rotate around the torque tube. Here is a shot of the rib, with bearing in place, in position next to the bracket.
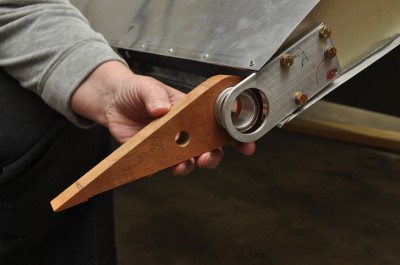
The weldment goes over the rib, as you can see in this photo. (When installed, the weldment will be all the way over the rib. It is just kind of “in position” for this photo so you can see how the components fit together.) The flaps are operated by pulling down and pushing up the rod that sticks out of the weldment.
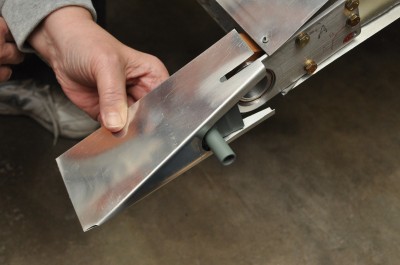
Finally, the whole thing will be covered by a sleekly aerodynamic wedge of aluminum.
My first few days of working on the flaps has gone very smoothly. Here’s hoping that the rest goes just as well.

Mazel tov!